Fun Ways to Celebrate Earth Day with the Kids
 Earth Day is tomorrow and there are so many fun ways to celebrate with the family. From simple tips to help your family go green, to baking Earth Day treats, to starting your own garden, to recycling crafts, here are the best ideas and activities I’ve seen to celebrate Earth Day this year.
Tips to Help the Family Go Green
-
Simple Mom put together a very thorough post on 40 Tips to Go Greener at Home.
Here are 5 Fun Ways to Help Your Family Go Green for Earth Day.
She Knows had some good ideas on teaching the kids to celebrate Earth Day.
Help your kids write The Lorax a letter on how your family is doing its part to protect the environment. It’s just one of the fun activities as part of the Lorax Project.
Earth Day Treats
-
Tidy Mom made some super cute Earth Day cookies. See how easy they are to make.
These Earth Day Chocolate Cupcakes from Dessarts look so yummy.
This Earth Day Dinner Menu from Secrets of a Supermommy is so fun and amazing. The African Jungle and Ocean treats she made for dinner are awesome.
Earth Day Fun and Games
-
There is no better way to celebrate our Earth than by digging in the dirt. Teach your kids to garden with these fun tips and projects.
On Earth Day, enjoy nature by having a picnic. Remember to leave no trace in the park and pick up after yourselves. For more fun, Oh Happy Day shows you how to make your own Paper Picnic Baskets. So cute and easily recycled when you are done.
Kitchen Counter Chronicle shows you have to organize an Earth Day Scavenger Hunt for the kids.
This Leaf Print Art idea from Skip to My Lou is very pretty and easy to make.
Recycle your old crayons and turn them into Heart Shaped Earth Day Crayons, courtesy of the TSJ Photography blog.
Finally, the East Coast Mommy Blog has a great post on 10 Earth Day Activities for Kids.
Earth Day Art
-
Living Locurto shares this free printable Earth Day Bookmark with tips for the kids on how to protect the earth.
Nothing but Country shares a beautiful free Earth Day Art printable that’s perfect for framing.
These fun free printables from Modern Parents Messy Kids help you and your kids set up recycling stations around your house or classroom.
What are you going to do with the family to celebrate Earth Day?
You Might Also Like:
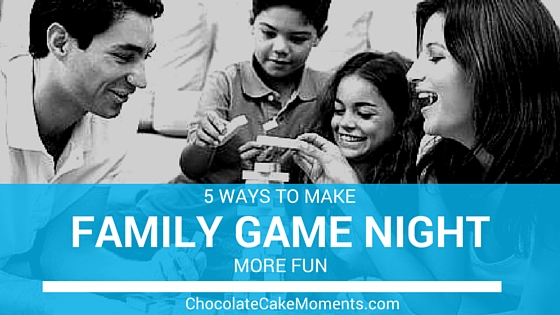
5 Ways to Make Family Game Night More Fun